Today in Culinary School we made Paris Brest. Sounds pretty great, huh? Well, it is. It is pate a choux (the dough that makes eclairs, cream puffs, and profiteroles, among other things) shaped in wreaths, baked with almonds ontop, and cut in half. Then, praline pastry cream is piped into the bottom half, then whipped cream. The top is coated with chocolate stripes and sprinkled with confectioners sugar. Delicious!
Well, I felt inspired to make my own at home, since I had leftover praline pastry cream and the pate a choux we made in class used glutenous bread flour. So I got to work. And here are the recipes:
Praline Pastry Cream
In a saucepan, infuse 1/4 vanilla bean (cut in half and with the seeds scraped out and added to the pot along with the pod -- you can also substitute with 1 tsp vanilla extract) with 1/3 cup sugar and 1 and 1/2 cups whole milk. This basically means: heat the ingredients over the stove until little foamy bubbles form around the edges of the saucepan and little whisps of steam begin to rise up. Set aside.
In a separate bowl, mix 4 egg yolks with 1/3 cup sugar and 1/3 cup cornstarch.
Temper the eggs: pour 1/3 of the steeping milk mixture into the egg mixture while whisking. Pour this mixture back into the milk (in the saucepan).
Place the saucepan back on the stove over medium heat until the mixture begins to thicken. Stir constantly. You want to cook the custard for at least one minute to cook off the corn starch taste but you do not want your eggs to curdle.
When it is thick (like pudding) and you have cooked the corn starch off, strain the mixture into a bowl. To the bowl add 1 tbs butter and 2 tbs praline paste. (Praline paste can be found at some specialty natural food stores. You can also substitute with the more common cashew or almond butters.) Stir them until the butter and paste melt into the custard and are fully incorporated. Cover with plastic wrap and place in the refrigerator.
Gluten Free Pate a Choux
First, preheat your oven to 400 degrees F.
In a saucepan, heat to a gentle boil: 1/2 cup water, 1/4 cup butter, 1 pinch salt, 1 tsp sugar, and 1/2 tsp vanilla extract.
When the butter is all melted and the mixture is bubbling gently add "1/2 cup minus 1 tbs superfine rice flour". It will absorb very quickly, so be sure to stir, stir, stir with a stiff spoon (no spatulas, people!). You want to get all the flour chunks out. Stir over the heat until a skin begins to form on the bottom.
Immediately, place into a standing mixer bowl and mix on medium for five minutes. This will cool it. If you do not have a standing mixer, place the dough in a bowl and mix with a hand mixer. But be careful, this dough is very gooey and will throw your hand mixer all around so have a firm grip!
When the dough is cool add 2 eggs plus 1 egg white, one at a time. With each addition of egg or egg white, mix on high in the mixer bowl until it is fully incorporated. When all of the egg is added, the dough should be gooey like glue or paste. A bit of dough between your thumb and forefinger should stretch to at least 2 inches, like this:

Pour the dough into a piping bag and pipe onto a parchment paper lined sheet pan. You can pipe eclairs (long strips) or puffs, or any shape you like, really. Here are mine before I popped them in the oven (not my best piping work):

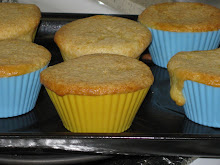
Bake the dough for about 45 minutes. You want the eclairs/puffs to be golden brown and you want to make sure to cook the dough all the way through. If there is raw egg inside the puffs/eclairs, they will turn green on the inside! When they are done, they sound hollow when tapped and, when broken open, the dough is firmly cooked through. (Always make one extra puff so you can open it and see how it looks inside.) Let the eclairs/puffs cool on a cooling rack. Here is what my puffs looked like when they came out of the oven. Not exactly uniform:

*Interesting tidbit: pate a choux translates in French to "cabbage paste." Guess the guy who invented this dough thought that, after it was baked, the little puffs that came out of the oven looked like cabbages...how quaint!
Chocolate Coating
Boil a pot of water on the stove. When it is boiling, turn the heat off and place a bowl filled with coating chocolate (6 oz will do) ontop. Stir it gently until the chocolate melts. Keep it over the warm water to prevent it from seizing and getting hard again. It will look something like this:

Praline Eclairs
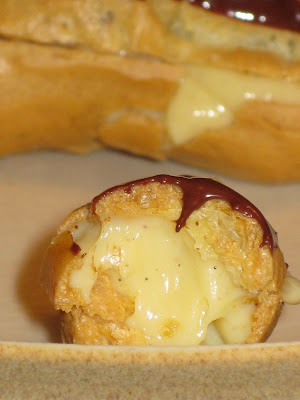
To assemble the eclairs, first cut them in half lengthways. Dip the tops in the coating chocolate and let them harden. Fill the bottoms with the praline pastry cream. Put the tops on the bottoms and, voila! You've got delicious eclairs. (You can also poke a hole in the side of the eclair and, using a pastry bag with a hard tip, squeeze the filling in; then coat the top with chocolate. Be careful to bite the end with the hole in it though!) Here are some glamour shots to feast your eyes on:


